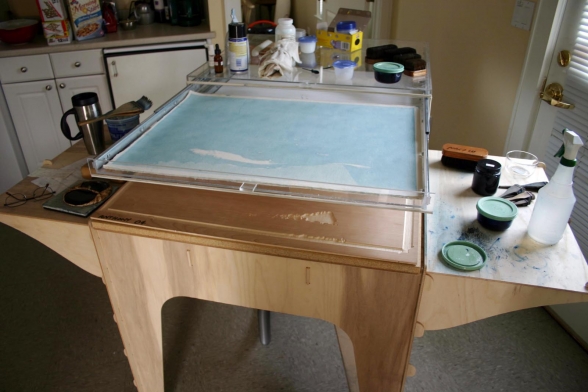
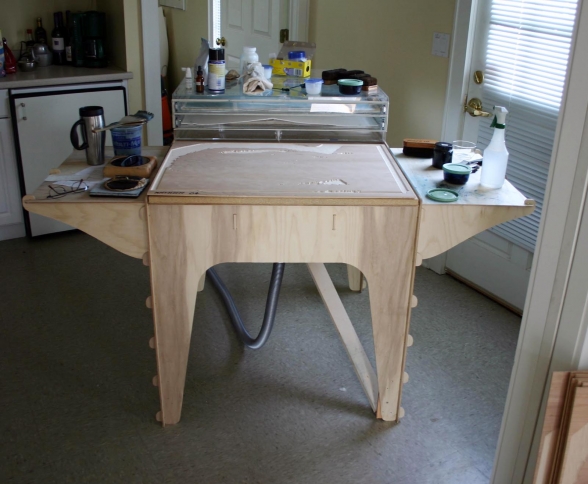
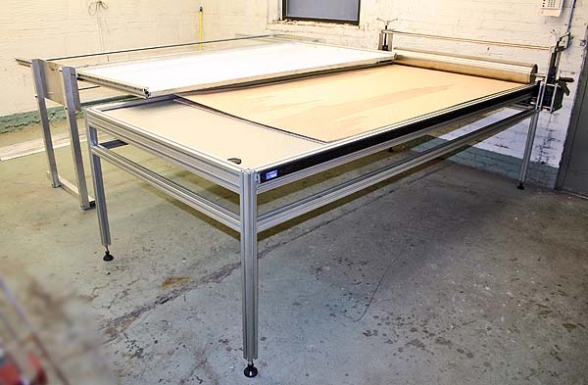
Thought I’d post while waiting for the local hardware store to open this morning and show off my much-simplified paper-delivery scheme for the large press. I designed a previous sliding drawer humidor for my portable printing table — it works very well and handles papers up to about 22 x 31 inches, but would be way too heavy scaled up for the large press:
This ‘small’ humidor is a sealed plexi box which dovetails onto the table. It has two open-top drawers with blotter in the bottom to keep paper damp and ready for printing. The bottom drawer slides open just over the block by pressing a foot ‘pedal’. A sheet may then be pulled up over the lip of the drawer and registered onto the block while supported by the drawer. As the foot pedal is released, the drawer slides closed under the paper allowing it to settle onto the block very sweetly!
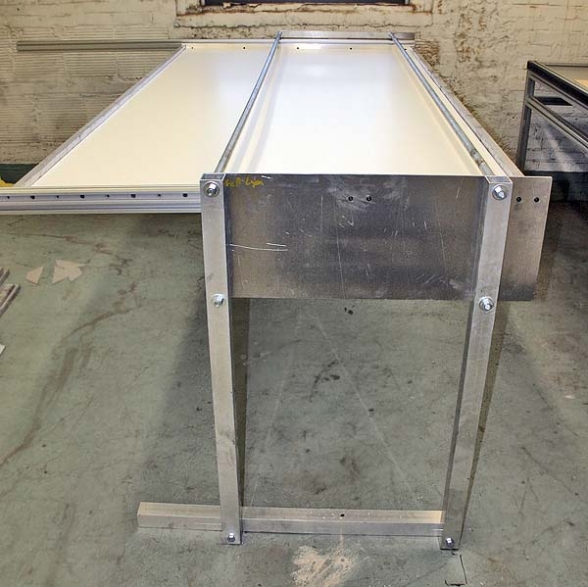
The new humidor is a very scaled up and mobile version of a traditional Japanese damp-stack. The bottom of the drawer is a 4 x 8 foot sheet of 6mm Coroplast (corrugated plastic sheet) which supports the damp stack — 1st the damp blotter, then the dampended sheets (up to 4 x8 feet), then ‘sealed’ with another sheet of Coroplast. The top sheet will be supported by a simple lifting bar, similar to the way silkscreens are generally supported above the paper until the screen is dropped — a pair of short retractable legs will hold the Coroplast above the paper stack during registration (while the drawer is open over the block). When the drawer is allowed to close, the ‘legs’ will be retracted by the structure of the drawer support and the Coroplast will settle back down, sealing the dampstack until it is time to print the next sheet. Printed sheets will be peeled up from the back and slid down over the front rail of the press into a similar drawer (not yet completed) which opens to the front mounted under the lower rails of the press. When a press pass is completed, the whole stack of printed papers will be picked up as a sandwich and flipped neatly back into the open paper delivery drawer (I HOPE)!
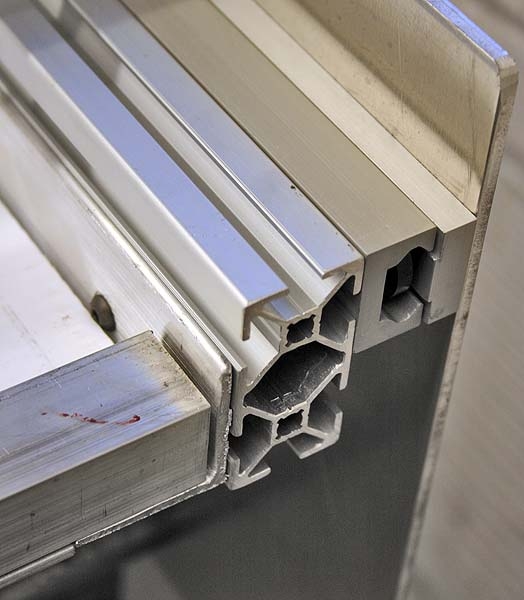
Because I want to be able to move freely around the press while brushing up the block, I’ve left a 24″ aisle open between the press and the closed paper delivery drawer, so the drawer has to move quite a long way to arrive over the block! Each ‘glide’ of the large drawer is a bit over 87 inches long, stiffened by a 30x60mm aluminum extrusion. To prevent tipping, the drawer frame will be bolted into the floor (which is my hardware store visit, as they supplied me with the wrong size mounting hardware late last week — ugh)…
The drawers are quite simple — the long front and back are 1″ square x 1/8″ aluminum tube with 1-1/2″ x 1/8″ flat bar screwed underneath to provide a lip for the CoroPlast bottom. The sides are 1-1/2″ x 1/8″ aluminum angle, and there’s another bar mounted in the center between the front and back tubes to prevent bowing during open and close actions.
The drawer support is a simple trestle, held parallel by four lengths of 1/2″ galvanized pipe tensioned with all-thread running the length and piercing the the 3/16″ aluminum end plates and the 2″ square tube legs — tightened with four nuts and washers on each end. Bottom tube is bolted to legs and floor to prevent tipping.
Next step: assemble the vacuum plenum for the press, assemble the bottom printed paper receiving drawer, and finally decide how to get the drawer to open and close while I hold the paper registered to the block with both hands! Getting REAL close to printing again, at last!
By the way, the press ‘action’ is a dream come true — glides so easily and surely across the bed regardless of pressure setting — I hope the thing PRINTS every bit as smoothly and beautifully as it seems to operate!
