Lennie Berkowitz, retired director of the Cohen Berkowitz Gallery, gave me an unusual commission — a kitchen stool for her Cabo San Lucas home which she could pack up in a suitcase and assemble herself in Mexico. So I made her a knock-apart stool, complete with detailed assembly instructions…
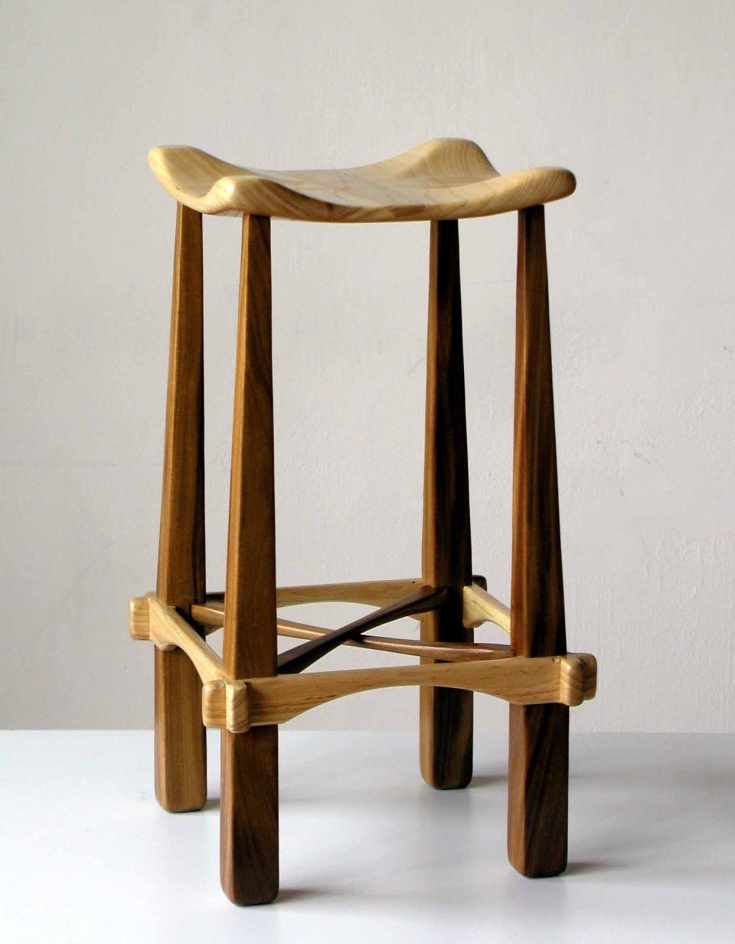
This is one of my “typical” curved top stools with some fancy joinery — sort of a cross between a Chinese puzzle and an old fashioned box-kite! it stands about 25 inches high and is constructed of Birch (seat and rails) and Afrormosia (African Teak – legs and stretchers). It’s a nice shape, comfortable (especially when you sit on a diagonal) and I think it’s light enough to be carried easily. The parts fit very well and are intended to be assembled and used without glue or fasteners. It ‘could’ be glued together, but I think it is much “cooler” un-glued and un-fastened). Because the top can be lifted off, it ought to be carried around by the legs, I think.
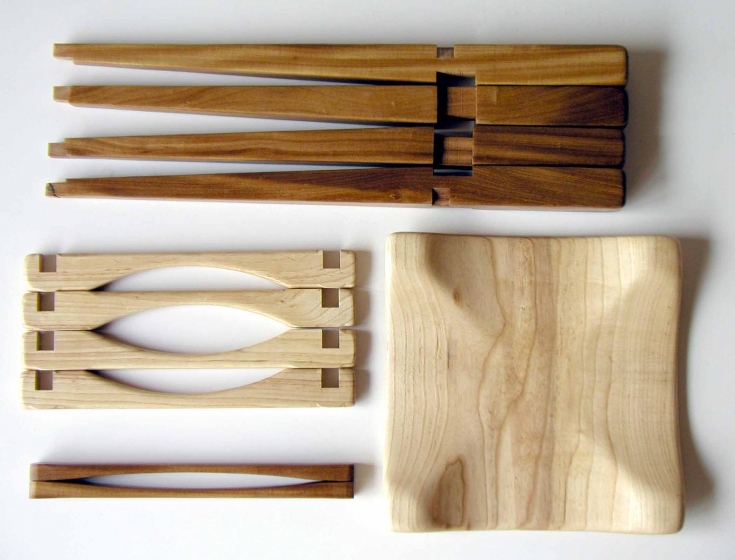
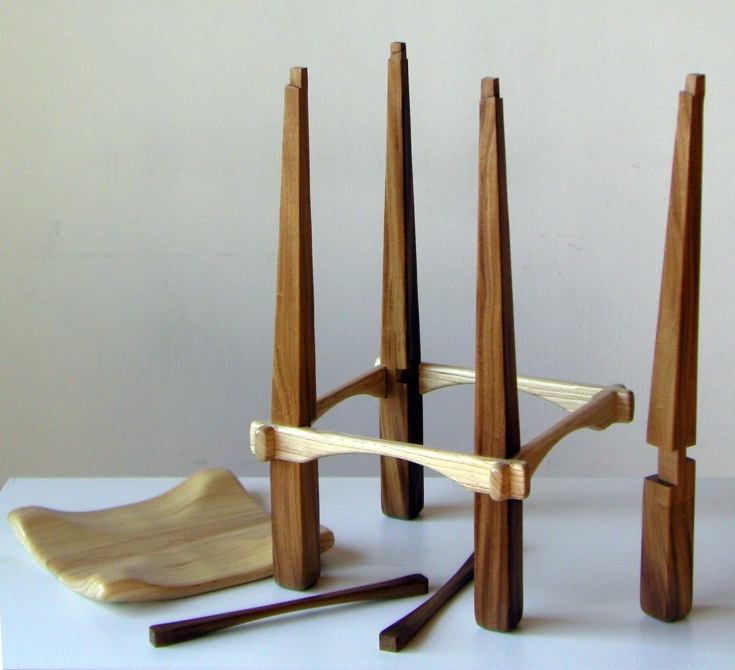
Here’s a photo illustrating the parts of the stool. The four legs are on top. The four rails are on the left, with the two stretchers underneath them. The seat is in the lower right.
The four stretchers have to be assembled so that the symbols (a ‘dot’, a ‘square’, a ‘dash’, and an ‘X’) penciled in the notches match and so that the “sharp” or “square” top and bottom edges are on the inside… It is possible to put the rails together with the symbols all nicely matched up, but with the “sharp” edges to the outside, so be careful — the “sharp” edges MUST be on the inside in order for the legs to fit properly. The top of each rail is “flat” and the bottom of each rail is “curved.”
After you have the rails together, you should install one of the legs into the inside of each corner of the rail assembly so that the rails fit ALL THE WAY into the large notches in the legs and there is no appreciable space between the the rails and the legs. They fit pretty snugly, but you should be able to squeeze the legs into place using only the strength of your hands. Be sure the rails are exactly fitted so the top and bottom are flush.
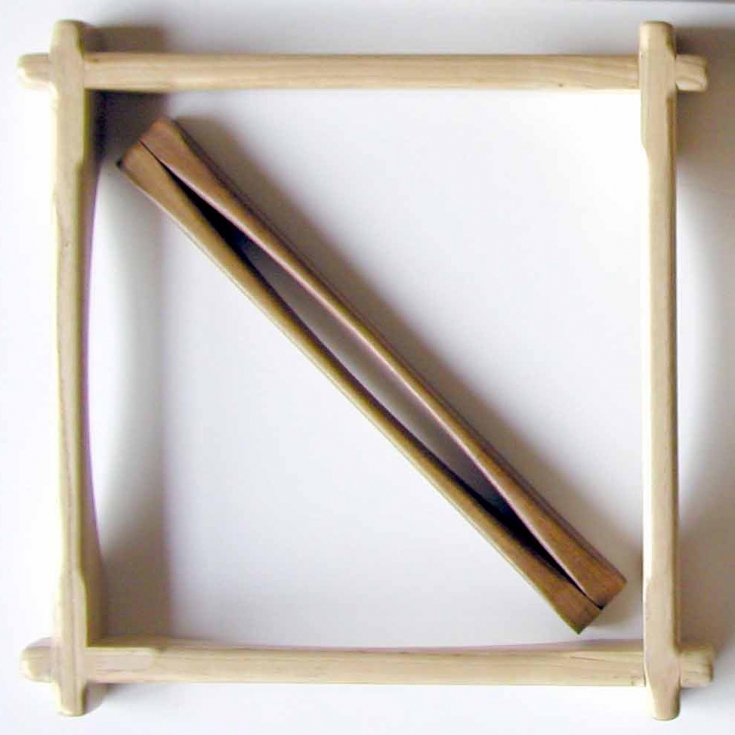
Once the legs are in place, put the stretchers in. The stretchers are carved so they are “bowed” on one side and flat on the other. Put the first stretcher in so that the “bowed” side faces “up”. You’ll have an easy time of it if you rotate the stretcher so that it fits next to the slots on opposite sides of the legs, and then “rotate” the stretcher into position. The first stretcher is usually easier to place than the second. The second goes on top of the first, but with the “bowed” side facing down.
Now slip the seat onto the leg tenons and press it down until it fits. The stool should stay together and be reasonably stable.
